Installing Corona SDK — Windows
This guide will help you get up and running with Corona SDK for Windows.
Installing Corona SDK
Corona SDK on Windows only supports building for Android and Win32 desktop, while Corona SDK on macOS supports building for iOS, Android, and macOS desktop.
You do not need to install the Android SDK to use Corona SDK. However, to create device builds to test on actual Android devices, you will need the Java Development Kit. The installation process is described below.
We'll assume you've already downloaded Corona SDK. Now, double click the .msi installer file and follow the steps in the installation wizard.
There are two ways to stay current with releases/builds of Corona:
Public Release — The latest stable release of Corona SDK, providing maximum reliability for your projects. This is updated several times a year.
Daily Builds — The bleeding edge. Daily builds contain the latest features as they are integrated into Corona.
Corona SDK Activation
In order to use Corona SDK, you must be connected to the Internet and perform a simple
Open the Corona Simulator from the folder where you installed it. The first time you launch, you will be presented with a

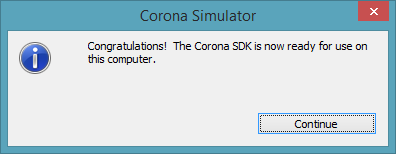
Upon successful login, you will receive a confirmation dialog. You're ready to get started!

Java Development Kit Setup
Installing Corona SDK lets you create and test apps locally on your PC. To build an app for testing on an Android device, you need to install the
- Go to the JDK download page.
- Locate Java SE 7 and click the link.
- On the next page, locate the
Java SE Development Kit 7u80 link and click it. The page should scroll down to a box with various download links. - Read the license agreement and accept it if you agree.
- Slightly below, locate the Windows x86 row and click the associated link to download the file.
- When the download is complete, run the installer. Be sure to install the
Java Runtime Environment (JRE) as part of the installation.
Corona Editor (IDE)
Corona Editor offers developers a very capable and lightweight IDE. Corona Editor streamlines development and includes the following:
- Debugger — set breakpoints and inspect variables.
- Snippets — get help with syntax and coding conventions.
- Code completion — save time for all APIs and constants.
- Docs — bring up APIs directly from your code.
- Launch — run the current app in the Corona Simulator from Sublime Text.
For more information, please see the Corona Editor page.
Other Text Editors
If you don't already have a favorite text editor, the following options are recommended:
| Editor | Add-On Package |
|---|---|
| Atom | autocomplete-corona |
| Visual Studio Code | Corona Tools |
| Sublime Text | Corona Editor |
| Notepad++ | |
| Vim | |
| ZeroBrane Studio |
Corona Development Environment
The Corona SDK development environment consists of two aspects: the Corona Simulator and the Corona Simulator Output window.
The Corona Simulator is a visual representation and test environment for your app. What you see in the Simulator is generally what your app will look like — and how it will function — when deployed to an actual device. The Corona Simulator is an essential tool because it allows you to view changes to your code instantly in an active, responsive environment that closely mimics the device.
The Corona Simulator Output is where you can view diagnostic messages about what's happening in your program. This window is automatically displayed when you launch the Corona Simulator.
Welcome Window
The Welcome Window provides access to Corona developer resources. From here, you can also press
Corona Simulator Preferences
The Simulator has several preferences which let you customize the development workflow.
Deauthorize and Quit — the number of different computers on which you're allowed to run the Simulator is limited, so you'll need to deauthorize a computer if you stop using it. You can also use this button if you need to change the Corona account credentials you're developing with.
Anonymous feedback — approve the sending of anonymous usage information that helps us improve the Corona Simulator.
Don't show the Welcome Window — don't show the Welcome Window when launching the Simulator.
Automatically open last project — upon loading the Simulator, open the most recently edited project.
Show Runtime Errors — show a diagnostic popup when the application experiences a runtime error. This helps in debugging application code.
Building Apps
When you want to build your app for distribution or to test on a device, choose File → Build and select the desired build option. The entire process for each OS is outlined in the following guides:
Command Line Usage
To start a particular app in the Corona Simulator without double-clicking it, use a command like this:
"C:\Program Files\Corona Labs\Corona SDK\Corona Simulator.exe" "C:\Documents and Settings\MyAccount\My Documents\Corona Apps\My App\main.lua"
If you don't want the Corona Simulator Output window to automatically appear, use the /no-console option:
"C:\Program Files\Corona Labs\Corona SDK\Corona Simulator.exe" /no-console
After using the /no-console option above, all Lua print() functions and Corona log messages can be received via the standard output stream (stdout).
One additional flag is allowed (/debug) which allows an IDE to connect a debugger to the Simulator session. It should come immediately after the .exe.